9 Best Tips for motorcycle service maintenance
The time spent is well worth the reward of knowing that your computer is in top shape. An hour at the shop is far preferable to troubleshooting by the side of the road or waiting for AMA roadside service, believe me.
If you’ve been following the motorcycle service handbook (the most important tool in your garage) and have properly prepared your bike for storage over the winter, you should be able to check off everything on this list with ease. But if you’re anything like the rest of us (including me), you probably went above and above, got chilly, and cooked up a grilled cheese. Begin your sleeves rolled up and get to work on your motorcycle so you can ride it this spring.
Why do motorcycle services matter?
Before taking your motorcycle in for its MOT, it’s a good idea to get it checked out by a professional technician to make sure there aren’t any nagging mechanical or electrical issues.
Maintaining your motorbike on a regular basis not only keeps it running smoothly and extends its life, but it also makes it easier on you and the environment.
Walkaround
This may seem like a ridiculous question, but when was the last time you really inspected your bike? Since everything on a car wears down over time, it might be difficult to see whether a part has entirely gacked while driving. Putting your head in the “notice anything weird” mode might help you identify problems before they become serious enough to ruin your trip.
In case there are any cracks, look for them. Fork seal failure is indicated by oil and dirt streaks traveling down the fork legs. The source of the leak under the bike has to be determined. Is it a chill pill? Oil? Fuel? Try a whiff and trace its origins back from there. If the leak has persisted for some time, you may need to clean the undercarriage of your bike before you can identify its source.
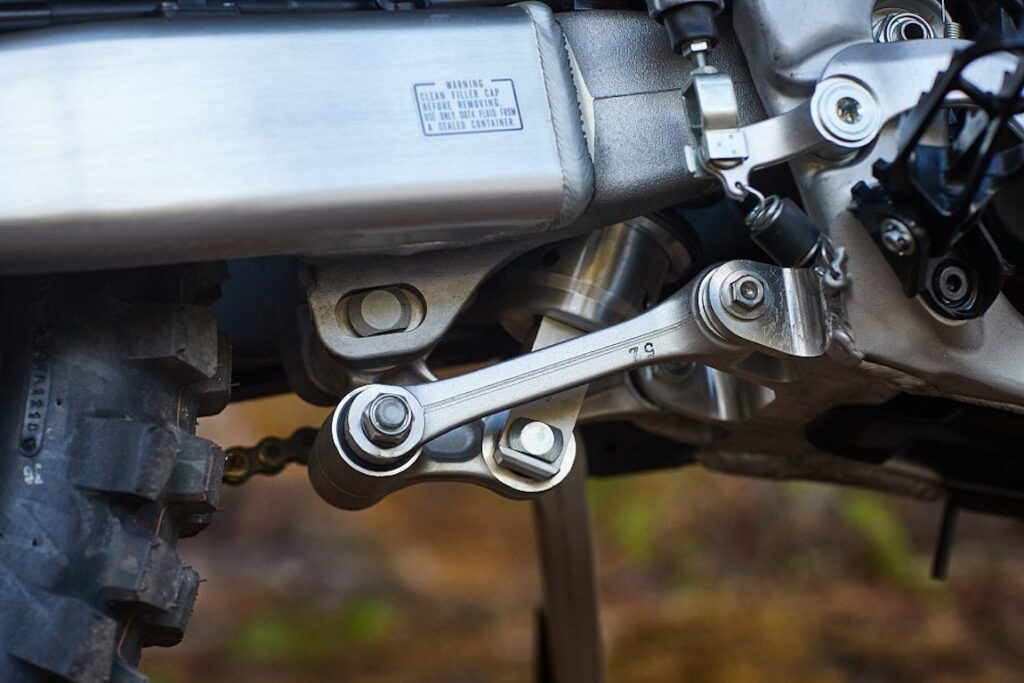
Check for wear and interference at pivot points and other moving components (kickstand pivots, swingarm and suspension linkages are almost universally neglected). The zerk fittings should be greased until clean grease oozes out the opposite end of the cavity; keep track of the bushings and bearings that need to be looked at or replaced.
Just turn the key. Make sure your registration and insurance are up to date, test your lights, then honk your horn. Weak or nonexistent battery? You’ll need to reconnect the power and double-check your connections.
Battery
A completely charged battery is the result of using a maintenance charger. If you don’t have one already, you should use one immediately. The battery’s ability to hold a charge is encouraging, but it’s no assurance that it won’t die on you during the season’s first major ride.
You may get a reasonable sense of your battery’s condition by probing it with a multimeter (the voltage should be more than 12.5 V DC at the terminals with the key off), but the gold standard is a battery tester that compares the cranking amps you enter to the CCA rating printed on the battery. Testing for standing voltage at the terminals is only one of several tests that may be done using a multimeter.
Even if you don’t have any expensive equipment, you can get a reasonable idea of your battery’s health based on how easily it cranks over your engine and its age. If your sticker’s manufacturing date is more than five years old, it’s probably time to consider a replacement. It’s preferable to replace a dead battery at your own convenience rather than rely on a shop or dealership, which might end up charging you for a tow in addition to the repair (ask me how I know).
Apply some dielectric grease after you’ve cleaned the terminals to keep them from rusting. Additionally, this is an excellent time to check the fuses in your home’s fuse box. It’s important to double-check your backups and, if possible, store some more. The need to have a bike towed due to a blown fuse is one of life’s most aggravating situations.
Wheels and tires
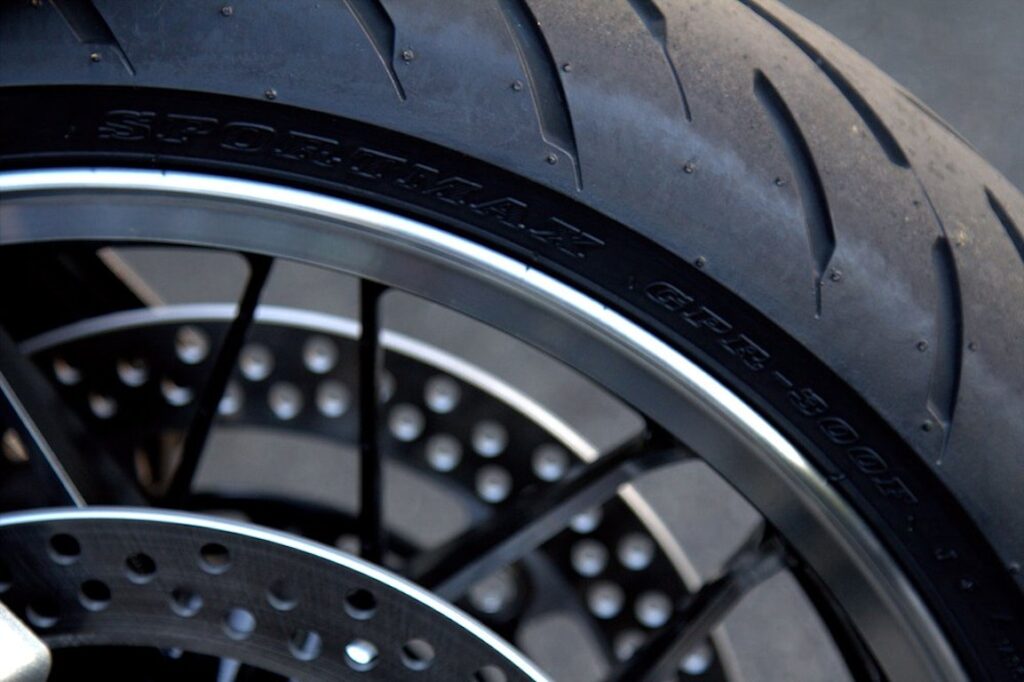
Tire condition is crucial and must be taken seriously. We motorcyclists only have two (or three if you count the passenger), and it takes a lot of faith to lean into the first turn. Although it’s necessary to think about how old the tires are, age isn’t the only (or even the most) crucial element.
Motorcycle tires have a longer life expectancy than you may assume, despite the widespread fear of compulsive date-code checks. Manufacturers typically set the “sell by” date on tires at five years, even though they design their products to last for much longer than that. If you buy a new set of tires and discover that they were produced a year or two ago, don’t worry; they still have their entire useful lifespan ahead of them. A set on a frequently used machine is unlikely to ever reach old age and stop working. Even so, you should consider the date of production while checking for dry rot, fractures, or excessive hardness of the rubber due to oxidation.
Wear is the most common and most dignified way a motorbike tire may die. If your tires have wear indicators, you’ll know it’s time to replace them when the bar that indicates wear (often located in a sipe or groove) is flush with the tire’s surface. If you are unsure, look at the tread depth where the tire has worn the least (almost always the center). Keep in mind that you’ll also need new valve stems (or inner tubes) and balancing weights if you’re going to buy new tires (if you plan to mount and balance yourself). It’s important to double-check that your wheel weights are still attached. Checking the wheel bearings is another important maintenance task, but only after you’ve lifted the vehicle off the ground.
A Bursig lift is an option if you don’t already own a jack or a Pit Bull-style front and back stand. An all-in-one, space-saving equipment that can hoist your motorcycle off the ground and safely move it about by yourself can be had for the same price as front and rear stands or a hydraulic motorcycle jack.
You can get going once you’ve got at least the front of your motorcycle up off the ground. Wheel bearings that are significantly worn can be identified without the need for removal. In order to identify excessive play, you need first grip either side of the wheels and shake them (a dead giveaway your bearings are toast). Give each tire a spin to test the resistance to rolling if everything seems secure. You can tell if the wheel is rolling smoothly on its bearings or feels crunchy by touching it; however, you shouldn’t expect the wheel to spin all day with the brake assembly still in place because the pads drag lightly even when not engaged and the chain, belt, or shaft final drive produces additional drag at the rear wheel.
Last gasp
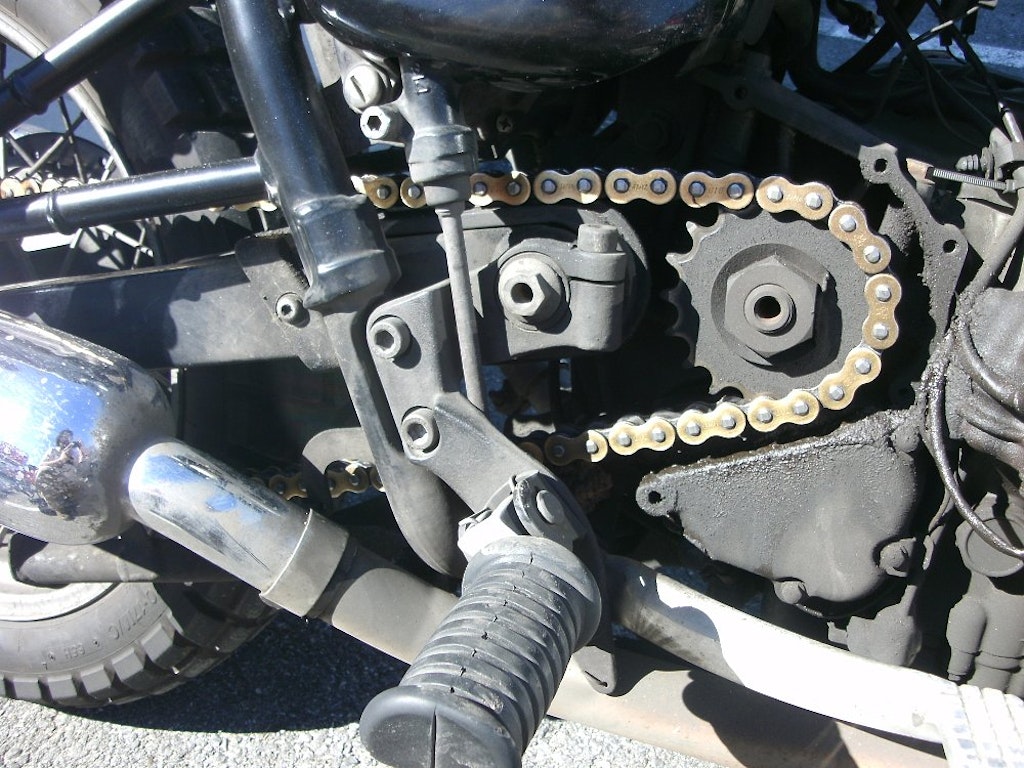
Watch the driving belt or chain as you turn the back wheel. (If you’re driving a shafty and can’t recall when you last changed the gear oil, it’s time to do so.) The first sign that it’s time to replace your chain or sprockets is if you notice any binding, seized links, or excessive wear. Lubricate your chain after cleaning it with a solvent and brush if everything seems OK. Don’t rely on the hatch markings on your axle blocks or swingarm (if you have them) to determine whether or not your chain is properly aligned; instead, use a dedicated alignment tool and a tension gauge. To determine if the chain needs to be changed, you can use the specifications for tension and wear provided in the handbook.
Belt drive? Check it for cracks, wear, and loose strings. A glazed belt or one with chunks missing from the teeth should be replaced. You should change a drive belt well before it is dangling by a thread, yet they survive for a very long period. A broken belt will not only leave you stranded, but it also tends to shatter when subjected to rapid acceleration (think merging on to a highway in front of tractor-trailers).
If the belt appears to be in good condition visually, you should check the specifications in the repair manual and then measure the belt tension. It’s money well spent (and is much more civilized than hanging jogging weights off the belt with wire or zip ties and measuring deflection). Remeasure after making any required adjustments, such as spinning the whole shooting match.
Brakes
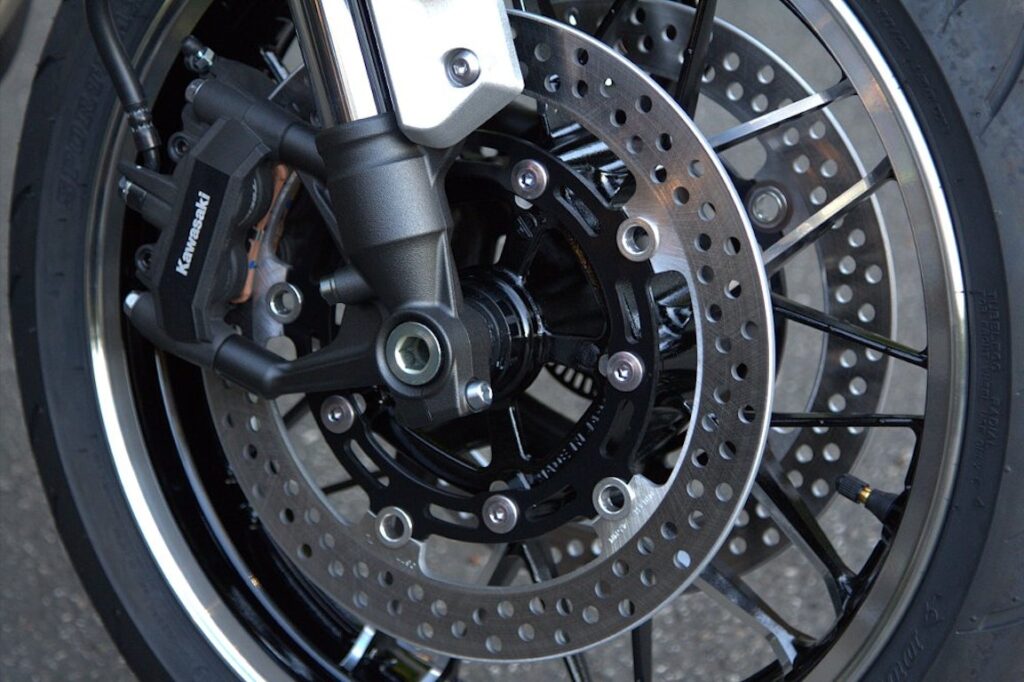
Inspecting the brake pads is best done with the bike still suspended in the air, but may be done with the tires on the ground. To check for warping of the rotors, just rotate the wheels. You should also visually look for glazing and feel the surface of the rotor for any scoring. Don’t freak out if you notice a little rust on the outside. This is typical if your bike has been resting for a while; it will go once the brakes are utilized. However, I still prefer to give them a little spray with brake cleaner to make me feel better.
Check if the pads are wearing evenly and make a note of how much flesh is still remaining on them. To make sure they are still operational, compare the depth of the remaining pad material to the specification in your service manual. Using a brake pad down to the backing plate or below is a shortsighted move that might result in the destruction of the rotors or, at the at least, in an inability to stop.
Check your brake lines for signs of wear and tear. Even if your bike is just five or ten years old, the rubber brake lines might be ready to be replaced because they don’t last very long. Feel and control of the brakes will be vastly enhanced with the installation of new stainless steel lines. It’s much more typical for people to forget about brake fluid than to maintain their lines. You should check your handbook to see how often the fluid should be changed, although those that ride frequently (track days? ), or who follow strict maintenance schedules, should change the fluid every other season, or if the fluid becomes too hot.
Fluids
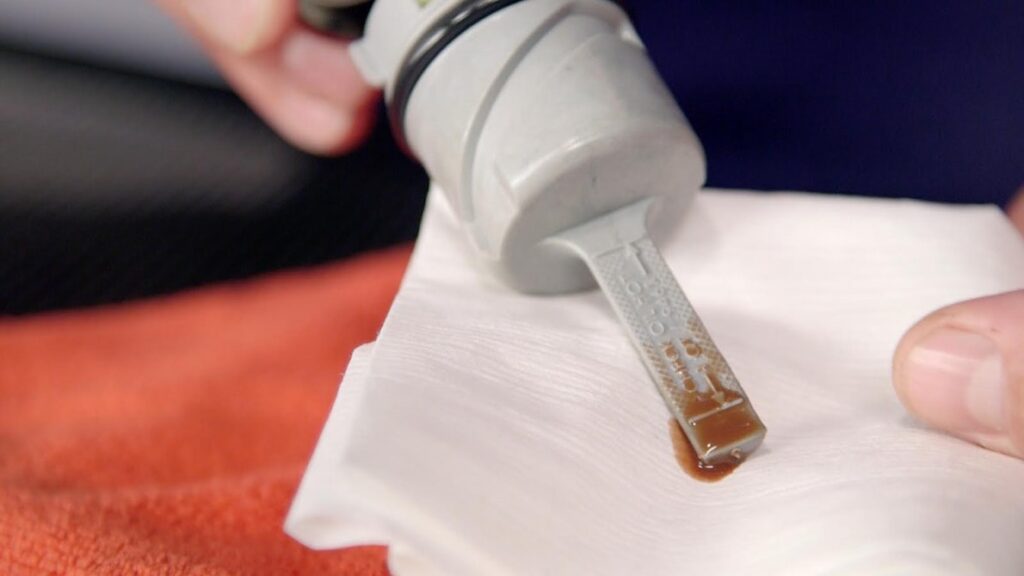
It’s not just the brake fluid that gets neglected. What’s the coolant’s age like? Though the frequency with which you should change the coolant in your machine may vary, it is generally recommended that you do it every other season (check the manual). Corrosion in your cooling system may be avoided with a simple drain and refill, or even a full flushing with water. (It’s inexpensive insurance to replace the radiator cap at the same time.)
If you’re anything like me, you probably needed to have an oil change done before the winter ended, but you ditched your coveralls in favor of a robe since you were too chilly to do anything else. The main fluid, transmission fluid, and engine oil in my Dyna are all past their expiration dates, so I’ll need to replace all three of them before taking my first trip of the year. It’s better to be safe than sorry, so it’s not a bad idea to get your oil changed a bit ahead of schedule even if you haven’t reached the mileage requirement yet. Regarding elapsed time, you should think about oil’s age in addition to the vehicle’s mileage. If you don’t put a lot of miles on your bike each year, or if you only have a few of them, changing the oil at the beginning of each riding season is a smart idea. Remember that short trips entail more heat cycling and condensation of moisture, which is the actual enemy of oil, so keep that in mind if your mileage is minimal. When choosing how often you should replace your oil, you should also think about the kind of riding you do.
Filters
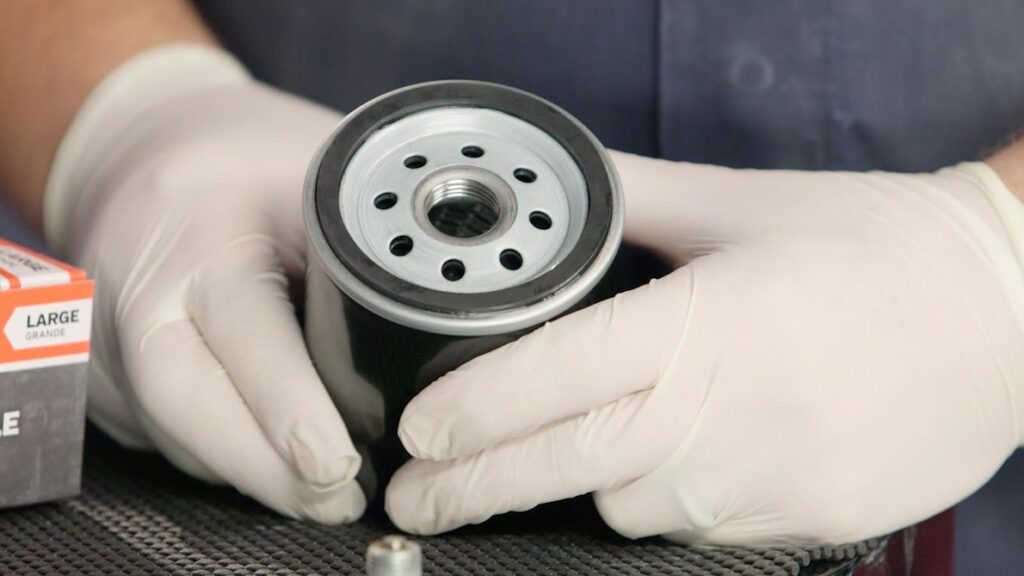
New oil filters should be used consistently, and gasoline and air filters should be recharged or replaced as needed. For my motorcycle, I need to change the air filter every time the oil is changed (about 5,000 miles), and the fuel filter every 25,000 miles. Also, the gasoline screen in the petcock or fuel pump pickup may need to be replaced, so it’s a good idea to consult the handbook or a parts diagram just to be sure. In addition, if your exhaust system has fiberglass packing, check for the presence of cotton candy coming out of the exhaust tip, an obvious sign that the packing is burned. This is not limited to dirt motorcycles or off-roading (a matter of hours, not miles, especially for two-strokes, where oil is a factor on top of heat). The muffler has to be repacked every time the air filter is recharged or replaced. Surely, what is taken in must be expelled.
Controls
Be sure the clutch and throttle are properly adjusted and working. With the help of this tool and some cable lubricant, you can free up any stuck clutch or throttle cables and fine-tune the tension of the push and pull cables so the throttle opens gradually but returns to idle on its own. Check for binding from incorrect cable routing or obstruction on the lever or throttle tube if lubrication and adjustment fail to alleviate a strong clutch pull or sticky throttle. To fix a problem with frayed wires, try a new set.
Check that your mirrors are still attached by sitting on the bike. Check for notchiness in the steering head bearings and for interference or strain in the cables and wiring by turning the handlebars all the way to the lock. Make that the shifter and the brake pedal are indexed properly. Last season, you may have become acclimated to a position that isn’t optimal, so make the necessary adjustments now so that you don’t develop bad habits. No matter what else you do, double check the shifter and brake for tightness (thread locker is my old friend). Consider yourself lucky if your shift lever has never fallen free and destroyed the spline shaft (it is a very invasive, labor-intensive job sure to cost you an appendage at the dealer).
Final check
Make sure all the important bolts and nuts are securely fastened, such as the handlebar and triple clamps, axle bolts and adjusters, and motor mounts. Make that the oil and coolant levels are at the proper levels. Verify that you have re-tightened whatever you may have loosened during your check. Get out a tire pressure gauge and make sure everything is good to go. Test the bike’s horn and lights once you’ve made sure everything else is in working order. At long last, you may turn the key and make a test drive to the next petrol station. Keep in mind that you should wait for the engine to warm up and that the tires may still be cold and slippery.
Now you know. Spurgeon advises us to “enjoy the ride” now.
Motorcycle servicing: What are the different options?
When it comes to maintaining your motorbike, you have a few different alternatives.
A full service, an interim service, or even a major service is available for your motorcycle.
In this article, we’ll go through what’s included in each motorcycle maintenance package.
Exactly what does a motorbike maintenance entail?
While the precise parameters of what defines a comprehensive service for a motorbike may vary slightly from one repair shop to the next, it is safe to say that a thorough motorcycle service will identify and solve any problems that might compromise the vehicle’s safe operation.
The following items belong on any comprehensive motorbike service checklist:
- Inspection of the Engine
- Maintenance on the engine’s oil will necessitate consulting the owner’s manual to determine the grade to be used.
- Replaced oil filter
- Upgraded air filter
- Freshly installed spark plugs
- Check the coolant level and add more if necessary.
- Mechanical inspections of the chassis and brakes
- Cleaning and reinstalling brake callipers
- Cleaning the brake pistons
- Hydraulic All necessary maintenance performed on the brake fluid system, including topping up and/or replacing the fluid.
- Lubrication and cleaning of all moving parts, including the throttle, clutch, and brake levers and pivots
- Car settings: fine-tuning the throttle and clutch
- Electrolyte levels in batteries are monitored and replenished as needed.
- Race bearings and steering play are checked for slop and corrected as needed.
- The functionality of the front fork was double tested.
- Back suspension system – functional inspection
- Inspecting and adjusting all bolts and nuts, including engine mounting and chassis bolts, if needed
- Verified the wheel bearings
- Both the primary and secondary stands were inspected and greased.
- Focus and direction of the headlights were examined and adjusted if necessary.
- A look at the fuel lines
- Check and adjust tire pressure as needed
- To fine-tune and lube the chain as required.
- Lubrication in general
Can you cut costs by using a motorbike service?
Having a complete service record will help you get the most money for your motorcycle when the time comes to sell it.
You may have asked yourself, “How many miles are too much?” if you’ve ever considered buying a motorcycle. In a nutshell, a bike with 25,000 miles on it that has been well-maintained will serve you considerably better than one with 10,000 miles on it that has never even had its chain cleaned.
An yearly stamp in the service log demonstrates to the buyer that you have taken good care of the bike and made an effort to give it the longest possible life.
It’s something you should demand from any prospective bike seller.
If you own a motorcycle, how often should you get it serviced?
Service intervals for motorbikes typically fall somewhere between once a year and every X number of kilometers. These intervals will vary from bike to bike, so it’s important to consult your owner’s handbook. After the first break-in period, however, you should only need to service your bike once a year.
Simple upkeep tasks like checking the oil level, changing it if necessary, replacing the battery, and testing the tightness of the chain once per week are all things you can do on your own.
However, experts should be brought in for comprehensive service.
The frequency of your rides will also have a role. Let’s say you’re a weekend warrior who only rides your bike a few times a month during the warm months. As a result, you won’t have to devote as much time to basic maintenance as a year-round commuter would, whose battery faces cold in January and whose chain endures grit, salt, and rain spray for 52 weeks of the year.
Your bike’s oil, tires, and brake pads may need to be changed more frequently if you routinely participate in track days or ride at high speeds.
How much for a motorbike service?
Again, a lot of this is bike-specific. For instance, my Moto Guzzi V7II isn’t something that just any repair shop can handle. It also needs special oil that isn’t practical to keep on hand in tiny quantities, leaving me rather reliant on service stations that do the work.
However, the average cost of a standard motorbike service is roughly £125, with rates going as high as £750 for a thorough service on a very rare or exotic motorcycle.
Bikes with 125cc engines or less may be purchased for a lot less money. Depending on the extent of service you want, you should expect to pay anywhere from £125 to £550 for maintenance on a fairly basic motorcycle, such as a Suzuki SV650, for which parts are widely accessible and local expertise is abundant.